Articles

Affichage des articles du octobre, 2014

Tuto Android :Utiliser une Intent pour passer d'une activité à une autre et envoyer des données via putExtra

Image
  Les deux vidéos suivantes contiennent un tutoriel détaillé qui vous permet d'apprendre à utiliser les Intent explicites et le passage de valeurs. Sinon vous pouvez suivre l'exercice qui existe en-dessous de la vidéo. Intent explicite :  Passage de valeurs en utilisant putExtra() de la classe Intent :  Dans cet exercice, nous allons voir comment passer d'une activité à une autre en envoyant des données après avoir cliqué sur le bouton. Créez un nouveau projet  et donner le nom de «Intention» à votre projet. Dans votre activity_main.xml mettez ce code: <RelativeLayout xmlns:android="http://schemas.android.com/apk/res/android" xmlns:tools="http://schemas.android.com/tools" android:layout_width="match_parent" android:layout_height="match_parent"  > <Button android:id="@+id/intent" android:layout_width="wrap_content" android:layout_height="wrap_content" android:layout_alignParent

Tutoriel Android :utilisation des boutons et des Toasts

Image
Dans ce tutoriel nous allons voir comment afficher un Toast (un message court) juste après le click sur le bouton. Créer un nouveau projet Android comme décrit dans le tutoriel précédent  . Nous allons commencer par éditer le fichier "activity_main.xml" situé dans le dossier « res/layout ». Effacer le contenu de ce fichier et mettez ce code la : <?xml version="1.0" encoding="utf-8"?> <LinearLayout xmlns:android="http://schemas.android.com/apk/res/android" android:orientation="vertical" android:layout_width="fill_parent" android:layout_height="fill_parent"> <Button android:id="@+id/buttonToast" android:layout_width="fill_parent" android:layout_height="wrap_content" android:text="Click here !" /> </LinearLayout> Nous avons supprimé le code existant qui contient un TextView et nous avons mis un code qui contient un Button. Le bouto

Introduction à la programmation sous android

Image
Android est un système d'exploitation "open source" :  Il a été créé pour permettre aux développeurs de profiter pleinement de tout ce que peut offrir un appareil mobile.   Android est dédié aux appareils mobiles, smartphones et tablettes, Smart TV etc   En 2005, Google a racheté Android Inc., une petite start-up à Palo Alto.   Android est essentiellement basé sur le noyau Linux, mais son interface a été développée en Java.   Android est supporté par un consortium composé de très diverses entreprises. Ce consortium est appelé l'Open Handset Alliance (OHA).  I. environnement de développement Vous pouvez télécharger l'environnement de développement ensemble de ce lien : http://developer.android.com/sdk/index.html Pour développer une application Android, vous aurez besoin : • L'éditeur de code Eclipse.  • Integrer le plug-in ADT (Android Development Tools).  • Le SDK Android (kit de développement logiciel). Après avoir télécharg

Google annonce sa nouvelle version d'android : Android 5.0 Lollipop

Image
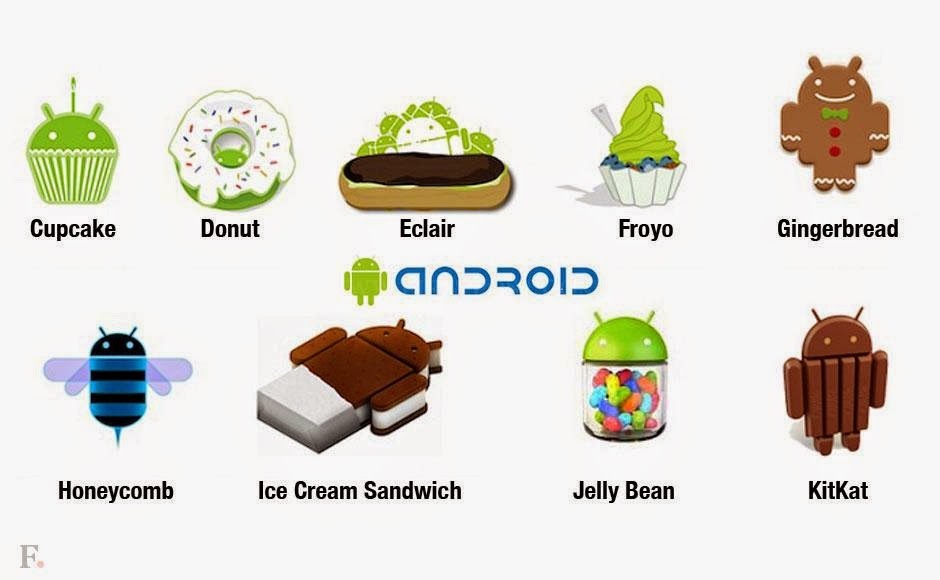
Après une période de test , Google annonce finalement sa version finale d'Android L. Android 5.0 Lollipop fait ses débuts sur trois nouveaux appareils Nexus ( smartphone Nexus 6 , tablettes Nexus 9  et Nexus Player streaming media device ) et sera disponible sur le Nexus 4, Nexus 5, Nexus 7, Nexus 10 et Google Play Edition devices dans les prochaines semaines.  Des améliorations visuelles et des changements de l'interface utilisateur caractérisent cette nouvelle version d'Android. La plate-forme Android dispose maintenant de nouvelles animations plus fluide, un design propre avec une palette de couleurs plus audacieuse, un menu multittasking remanié, et offre de nouvelles façons d'interagir avec votre voix.  La nouvelle version d'Android est doté d'un nouveau design: "Material Design". De toute évidence, il sera dominé par le design plat ou le flat design ( Le  flat design  est  un  design graphique minimaliste , débarrassé de tout ornement

Android alerts tutorial

Image
In this tutorial we will talk about Android dialog boxes and more specifically AlertDialog. Like any modal dialog box, an AlertDialog opens itself, takes focus and stay on as long as the user does not close it. This type of display is therefore well suited to critical errors or any other information which must read by the user. To create an AlertDialog, the easiest way is to use the Builder class, which provides a set of methods for configuring an AlertDialog. Each method returns the Builder to facilitate the chaining of calls. In the end, just call the show() method of the Builder Object  to display the dialog box. The most used configuration method of Builder are: ● setMessage () defines the "body" of the dialog from a simple text message. Its setting is a String or an identifier of a text resource. ● setTitle () and setIcon () to configure the text and / or icon that will appear  in the title bar of the dialog box. ● setPositiveButton () setNeutralButton () and

Android tutorial : AutoCompleteTextView example

Image
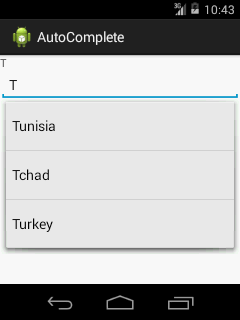
AutoCompleteTextView is sort of hybridization between an EditText and Spinner. It is a subclass of EditText. With auto-complete,the completion suggestions are  automatically shown while the user is typing. The list of suggestions is displayed in a drop down menu from which the user can choose an item to replace the content of the edit box with.The different  suggestions are displayed in a list of choices that looks like a Spinner. The user can then continue its input (if the word is not in the list) or choose an entry in it which will become the value of the field.  In addition, the property android: completionThreshold of AutoCompleteTextView allows  to specify a minimum number of characters to be written before the list of proposals  appears.  We can provide to AutoCompleteTextView an adapter containing the list of  Candidate values ​​using setAdapter () but as the user can enter text that is not in this list, AutoCompleteTextView does not use selection listeners. It is